The shields are placed in the shield rail on the outside of the hull. Oars are in rowing position. Note the eleven man crew. The Oseberg was said to have gold trim on the stem and stern.
This first picture shows the boat just starting to get rigged.
Some shields have been found with large holes in the center. I used these holes to brace the oars. Some of the oars found had three holes in them. Two in the blade and one in the handle. I used one of the blade holes to lash the oar so it was under tension like a strung bow. Oars are locked into shields in the oars-as-outriggers position.
My goal is to design oars strong yet flexible like a hunters bow.
I have made four oars so far. One cracked. On dry land not in the water. I asked an oar maker to make me a Viking oar. (I sent him a picture) he had about ten questions that I couldn't answer.
The oars are under great pressure while under sail so you can't hold one in your lap.
I had one of my oars with me on a 30 foot sail boat. When I tested my ideas of oars-as-out-riggers, my oar flexed with the surface of the water. I could push down as hard as I wanted and not push the blade under water.
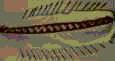
The second step is lashing the oar sails into position. Together with the oars-as-outriggers, they help resist heeling and allow the boat to skip down big waves.
Notice that the oar sail is under the oars. Thus the wing loading is carried by the strength of the oars. View show ends of oars, bottom of the ship and full view of the oar sails. Viewing angle is from underneath the ship looking toward the back.
Once I had the oars braced out in the outrigger position, it was a natural to add flat sails to the oars for a little lift while comming down a swell. The way to think of these oar sails is that they look like the webbing between the front and back legs of a flying squirrel.
These oar sails would act like the wings on a modern hang glider. Either sailing down the face of a swell or down the slope of a mountain pass the oar sails allow the Viking sailing ship to become airborne at about 45 knots. It would be a ride worthy of the name Vikings.
Unfortunately, the sail and ropes from Oseberg and Gokstad were not conserved. They did not have the technology for this 100 years ago. We will have to wait (hope) for a new excavation.
It is important to note that the oars are not set to act like hydrofoils. I tried that design on my test boat and didn't like the results. The oars are braced in such a way that they do not even touch the water untill the ship is moving at about 5 knotes. That way the pressure of the water makes the oars skim along the top of the water about like a water ski. Actually a trick water ski would be a better example. It is a little wider and has a lot less drag because it is flat.
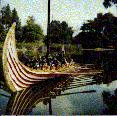
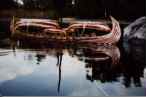
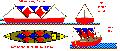
Five Boats make a clean setup for travel.
Small ships boats have been found with the larger Viking ships. Pictured here is my idea how the Vikings would have stowed those small boats while under sail. The small boats act like a roof over the larger Viking ship.
My goal is to design a sailing system that would give the Viking sailors the most protection from the sea while sailing. With these small light boats turned up side down and lashed on deck, we have a very sound, strong and light weight roof for the Viking sailors.
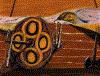
Russian nest dolls.

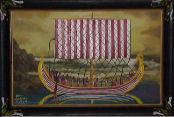
Viking Navy ship sail view shows the double sails.
A good view of the two main sails.
The short mast had always made me wonder about the lack of sail area. This two sail design gives three times the sail area. This larger sail area brings this design very close to modern sail size for a boat this size. It also allows the Viking Navy ships to sail upwind. Each small diamond sail can be thought of as a stunt kite attached at its' four corners. This can not be seen on this picture because these sails are just a flat mockup.
Imagine a stunt kite shaped like a square. About a meter square. Imagine 128 of these squares attached by just there corners. Each with the front corner of the kite pointing forward. Now attach this square of 128 stunt kites to the boom at top of the mast. Then attach the bottom of this square of 128 stunt kites to each of the oars that they line up with. At the point on the oar just into the blade where there is a hole on the oars from the Oseberg. Now do the same thing on the other side. You now have 256 stunt kites all pointing straight toward the front of the ship. Thus their orentation to the wind is determined only by the orentation of the ship to the wind. It makes for a very quick boat.
Will it work? If stunt kites can move fast in the sky this sail design will work. It looks great too. With the red and white squares.

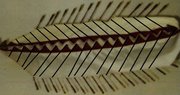
See the layout of the boat cover and the deck underneath.
The cover is half open so the deck of the ship can be seen.
Three ships boats were found with the Oseberg. They are all here. I added a few Kayaks just for fun. The Kayaks rest on two gang planks. These two planks rest on two of the smallest ships boats found. These two small boats rest in what has always been called the oar holders. The ship cover is open showing ship boats. The two large ship boats are tall enough so that a man can walk under them.
My design has a full boat cover strong enough to take the full effect of the sea. The sides of the boat cover are tied to the second hole in the oar blade. One practical benefit of this design is that it gives the sailors a fine place to store gear. That is above the oar sails and below the boat cover outside the hull. There it can rest on the oars and be lashed to the shield rail. This space provides a great deal of protection from the elements. Under the deck cover are the ship boats. These boats act like the roof support for the canvas boat cover.
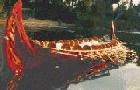
A good view of the dragon head and tail. The Vikings made their ships look like dragons so that native people would leave them alone.
Note the Viking sitting on the dragons head. In bad weather the dragon head and tail were removed.

The dragon head had a hole thru it so that smoke could be made to come out of the mouth and nose. Fish oil could be shot flaming out of the dragon mouth to give a nice, fire breathing dragon, effect.
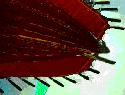
The storm fins are given their shape by using the paddle end of extra oars. These paddle ends create the leading edge of these storm sails. This make these small sails very strong.
The goal of these storm sails is to give the Viking ship some sailing power even when the sea is at its worst. With the mast down and these storm sails set, the Viking ship can roll over and still right itself and continue sailing. The oars that make the support for these sails themselves rest on the upside down ships boats lashed to the deck of the mother ship. This system makes the deck cover and storm sails very strong. With the deck cover lashed securely to the oar sails, the Viking ship can roll over and not get water inside the boat. It would float high and dry upside down. Then the oar sails would catch the wind and right the boat.
This picture shows a see thru of where the oars are positioned that hold up the boat cover and give the storm fins their structure.
Notice the ropes tied to the oar to hold it in position. The shield has it's center removed so the shield may be used as a brace to hold the oar in position.
The brown background is the ship cover. The ship cover is tied to the holes in the oar blades. Think of the ship cover as a large tarp that covers the entire ship. It keeps the deck dry and makes the ship more streamline.
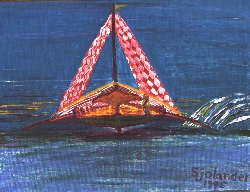
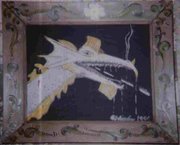
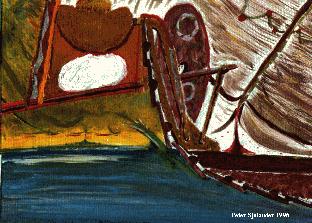
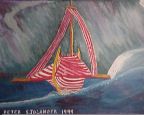
I painted this oil in 1993. This painting shows a very good use for the space over the oar sails. A fine place to sleep. I was standing with my back to the mast while painting. Notice also that the oar sails are lashed under the oars, around a rope that runs the full length of the ship along the oar holes on the outside of the ship and end up being lashed to the braces on the sides. The tarp you see half covering the ax handle is the edge of the oar sails. What you see here is the oars locked into the correct position so the blade of the oar skims along the surface of the water giving lift.
This oil painting is a cut away of a Viking ship. You can see the sunset under the oar sails. Above the oar sails is the Viking Kayak. Above that is his bed. And above that is the sleeping Viking sailor.
Off to the right you can see the underside of the boat cover.
Think of the ship cover as a large tarp that covers the entire ship. It keeps the deck dry and makes the ship more streamline.
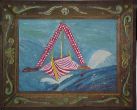
I painted this oil in 1996. It shows a cut away of a Viking ship.
What you see here is the oars locked into the correct position so the blade of the oar skims along the surface of the water giving lift. You see that the oars also make great rooster tails. Just like a water skier.
Notice that the ship lifts out of the water. Modern ships heel under the force of the wind, but with the oars resisting the heeling action the boat lifts instead. This lowers the drag on the boat as a whole.
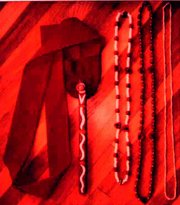
The Vikings seemed to know where they were on the earth. Thus I invented a Viking watch so simple and so accurate that the Vikings could have used it and we would have missed it in our archaeological studies. The parts that make up the Viking watch are as follows: A sash. This is used to hold the second part. The pendulum. This is made of wood and is about 14 inches long. The last three parts keep track of the time using beads on a string or knots on a string. The hour necklace has 24 counter beads on it. With a special bead marking midnight and noon. The minute necklace has 60 counters on it. I put a special counter ever ten minutes just see how I liked it. I also put a special counter on the necklace to mark the top of the hour. The second necklace has 60 counter knots on it. It has one special marker to mark the top of the hour.
The Viking on watch would hold the three necklaces is his left hand and pump the pendulum with his right hand. The second marking necklace would be pulled thru his hand one knot at a time each time he pumped the pendulum. Each time the second marking necklace reached the top of the minute marker the Viking on watch would advance the minute marker necklace one minute marker. Each time the minute marking necklace reached the top of the hour marker the Viking on watch would advance the hour marker necklace one hour marker. The Viking would thus be able to see how far they were away from where they started by observing how much time there was between local noon and the Viking watch noon. This watch allows the Vikings a way to know where they are without being able to count or add. Keeping track down to the second would allow them to know where they were to within three miles all over the earth. My hope is that archaeological evidence will support my Viking watch now that we have some idea what we are looking for... A stick of wood 14 inches long with a hole one inch from the end, and three necklaces with beads or knots. Two of the necklaces will have 60 beads and the other necklace will have 24 beads.
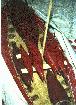
Viking ship on a runestone
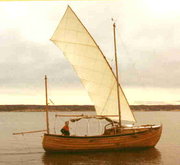
The rigging ropes on this picture have always made me wonder. Now I believe that this is how the Vikings rigged going into and out of the harbor. The sails are not tied down as they will be when out to sea. The sailors are all standing just like they do today when coming into harbor. The sheilds are hung on the outside to show the family crests.
I try to make my new designs so that they can be rigged to look like this runestone picture. I feel there is a lot of truth in this picture.
The boom shown here is longer than the boom found with the Oseberg. This boom looks like it is longer than the Viking ship. Where as on the Oseberg the boom is about 75% of the length of the ship.
On the Viking Navy designs I used the booms the size of the booms found with the Oseberg. Thus the Viking Navy sails are not as wide as the sails shown on this picture.

spilling wind from the sails
A row of sail diamond sails can be spilled with one rigging line.
Spilling wind
The left most sail is a half diamond. The right most sail is also a half diamond. The black diamonds are half diamonds cut the other way. Pulling on the row line causes the sail row to get shorter in the up and down direction. It also changes the shape of each diamond sail causing each diamond to spill wind off the trailing edge.